Wednesday, January 19, 2011
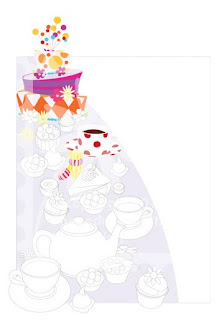
Alice in Wonderland - Mad Hatters Tea Party #3 Final
Ta-Daaaa!! This is the final piece. I am very happy with the results and look forward to starting on the next piece!!
My Process: Final Stage
After the flat color has been established, I am able to open the Illustrator file in Corel Painter. I use the magic wand to select the color areas that I want to render. After I have my marching ants running around my selection, I am free to chose my colors and paintbrushes and get painting!
I continue the process throughout the painting until I have a finished product.
Labels:
Alice in Wonderland,
cakes,
candy,
coffee,
dishes,
mad hatter,
picnic,
rabbit,
tea,
tea party
Thursday, January 13, 2011
Alice in Wonderland - Mad Hatters Tea Party #2
My Process (cont'd)
Here you can see that all of the flat color is completed and I have added the rest of the characters. This gives me a really good idea of what the final piece will look like when it is finished! I'm very anxious to get started on the painting! I've had this in the "works of my mind" for the past few years and now it coming to fruition!
Next, I open the EPS file up in Photoshop. Here I make the piece its final working size, clean up anything coming from Illustrator, and get it ready to move to Painter.
Labels:
Alice in Wonderland,
cakes,
candy,
cupcake,
dishes,
Mad Hatters,
plates,
tea party
Monday, January 10, 2011
Alice in Wonderland - Mad Hatters Tea Party #1
I've been working in Painter for a little while now, and finally feeling comfortable enough to start on bigger, longer projects. So, I have decided to post the progression of this piece. I have chosen to work on Alice in Wonderland's Mad Hatter Tea Party. This story has been near and dear to my heart. My mom took me to the movie theater for the first time when I was 3 years old. This movie caught my attention and left me with an appreciation for the imaginary.
My Process
First, I like to line out my design in black and white. Sometimes that is by hand with pencil, and sometimes it is by Illustrator. Here my work is in Adobe Illustrator.
After I have it all lined out, I begin to change all the shapes to flat color. If I am lining this out in pencil, I would scan it and open it in Photoshop. On a separate layer, I would paint all the areas a "rough approximate" local color that the object will be. By working this way, when I get to Painter to render the final piece, I will be able to select all of the flat shaped color and begin working it anyway I wish. Also, by making this selection, I am able to work right up to the edge of the selection.
Saturday, January 1, 2011
Subscribe to:
Posts (Atom)